Looking at the result, I, aswell as the group, am extremely happy with the result achieved.
As a group, we spent alot of our own time, aswell as class time, on this project, and I realy think that shows.
We managed to recreate some great scenes from around Essex, and to a really high standard.
The animation flows in the final video also, which I am very proud of as I spent 2 days on compiling the clips into the final video.
I also really enjoy the soundtrack we chose for the final animation. It really compliments the video and is an uplifting and happy song, and I feel like it entices you into the video, and makes you want to experience Essex.
Overall, we are all so excited with how the video turned out, and we enjoyed showing it to the rest of the groups, and to Elli, who really liked it also, which we are very happy with. Our main aim was to please Elli, and to have her use our video, and I think we have a good chance of our video being used on the website.
Friday, 10 December 2010
Thursday, 9 December 2010
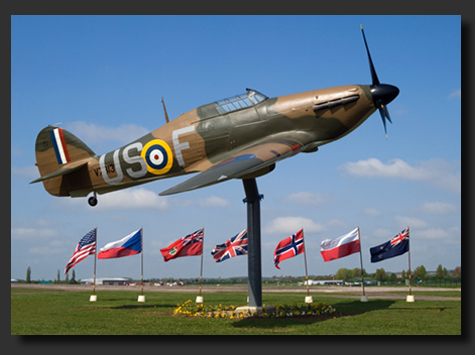
Finished Video.
And here, finally, is the finished article. Around a 2-Minute Animation promoting our wonderful county that is, Essex.
We hope you like it!
We hope you like it!
Wednesday, 8 December 2010
Adobe Premiere
Our task now was to compile our clips into the final animation.
for this, we chose to use Adobe Premiere, a program which none of us were too familiar with.
I decided to take the reigns on editing, as the others were still rendering their scenes.
I opened up a new project in Premiere, and named it accordingly, Visit Essex Project.
Once inside Premiere, I noticed that alot of the features were very similar to other video editing software I had previously used.
I exported the clips we had so far into our project file and started to organise them along the timeline.
Once everyones clips had been rendered, I imported all of the clips into the project file. Now I could arrange all the clips in the order I wanted along the timeline.
As a group, we felt it would be good idea to start mellow with the animation, starting with the coastal scenes, then working out way into our more detailed scenes as the animation progressed. We hoped to add a soundtrack to this thast would match the video output, slow paced throughout, but picking up around the more detailed scenes.
Once I had arranged the order of the clips, I added video transitions between each clip.
I chooped and changed between different transitions, as I felt the video would get rather repetative if the same transition was used time and time again.
As our car scene had been rendered from two different views, we decided as a group to chop these two clips together, swapping between the two views but along the same time frame, thus giving the illusion of two cameras active at the same time.
Once the video sequences had been completed, we felt it would be a good idea to add titles to each scene, just to remind the viewer what they're looking at.
I opened up the title editor, and created a small title for each scene for just the name of the location. Each title would then be added on top of each clip, in the second video layer.
I then added transitions to these titles, so that they faded in and out along the time of the clip.
At this stage, the video part had been completed, and it was at the point where sound could be added to the animation.
I started by collecting different sound effects from the Internet to go with out animation.
I collected a number of different sounds, including Spitfire sounds and Beach sounds.
I then started to add these to the clips.
However, after reviewing them, we as a group werent happy with the sounds, and decided to opt for a soundtrack for the entire animation.
This would also replicate the videos which gave us our initial inspiration for this animation idea.
We decided to opt for a mellow dance soundtrack called Poppiholla by Chicane.
The song is uplifting, and calming, and fits our animation perfectly.
At this stage, I left the project in the hands of Glenn and Jack, as I was unavailable for the final day of editing.
They added the soundtrack to the scene, and cut it shorter to alow the song to finish when our animation did.
Monday, 6 December 2010
Rendering
As anyone working with 3DSMAX will know by now, each scene you create in the software has to be rendered out in able for your to view it.
Now that all the scenes had been created, the task of rendering could begin.
Initially, we were doubtful of the quality of the clips, however, after some tweeking of the rendering settings, we managed to find out that we could render in HD video, which would give us amazing quality clips, perfect for our idea.
Obviously due to the higher detail and bigger resolution, these clips took along time to render.
Some scenes took at little as around an hour to two hours, where as the Anglia Ruskin scene created by Glenn took over 16 hours, IIRC, due to the amount of reflections in the scene.
Wednesday, 1 December 2010
Learning New Things - Particle System
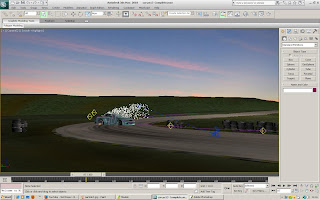
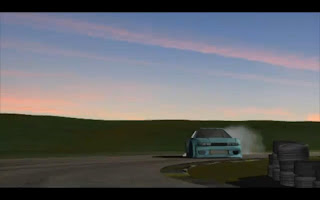
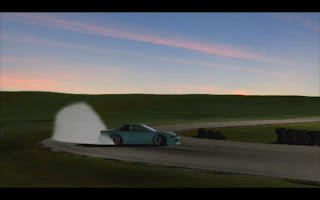
For the Car scene, we wanted to make it as realistic as possible.
For it to look realistic, we wanted to add smoke behind the car as it drifts around the corner.
I googled possible ways of making this happen, and it appeared that the most popular way of doing this is to use the Particle System that is built into 3DSMAX.
I found a tutorial here: http://www.republicofcode.com/tutorials/3ds/cigarette/
We changed the settings around so that we could achieve tyre smoke as opposed to cigarette smoke, which is what the tutorial gave information on.
After playing with it for around 3 hours, we managed to achieve the desired smoke effect, and so we linked it to the car, so that when the car moved, the smoke would move also. We also changed the life of the smoke, so that it dispersed as the car moved around the corner.
We feel that this really adds to the drift effect of the scene, and I am delighted that we have learned something new in this project. This is something that none of us have ever used before, and I really think the result came out good.
Here are some screen shots of our Particle System.


Tuesday, 30 November 2010
New Wheel for Car
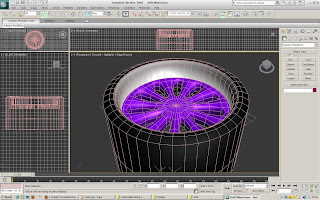
After Glenn had created the car for the Northweald scene, we discovered whilst trying to animate it that he had added camber to the wheels on the car. This would make it extremely difficult for us to animate them without them moving un-naturally.
Instead of trying to make them work, we decided it would be much easier to create another wheels for the car, which I set about doing.
The wheel was simple to create, and was made out of a flat cylinder to start with for the face of the wheel, with the edges then extruded up, down, in and out to create the lip of the wheel and the tyre.
We felt creating the back of the wheel would not be necessary as this part would never be seen, so the back was left open.
For the material, I gave each part of the model a different material ID. I then created a multi=sub=material to use on the wheel, which a chrome effect for the lip, a shiny silver for the face, and a satin black for the tyre.
Here is the finished wheel.

Wednesday, 24 November 2010
Visit Essex Scene
I wanted to create an actual scene for the title of Visit Essex, as opposed to putting a title on top of our video.
I decided on a statue theme.
I wanted to create the Visit Essex title as if it were a statue, set in a field in Essex somewhere.
For this, I started by creating planes for the scene to be based around. I created one plane for the field, and one plane for the sky and background. I then slightly modified the field pl;ane so that it sloped up towards to the background scene at the rear of the scene.
Now it was time to create the statues.
I used the font tool to write our my title.
I then converted these into an Editable Poly, so that the letters could be made 3D.
I extruded the letters to a substantial depth.
I now had the title in 3D form.
From here, I used the Element tool, and selected each letter individually.
I then jumbled up the letters a small amount, so that they appear to be leaning on each other to keep themselves up.
Now that I had my statues in places, I could move onto lighting.
For lighting, I used Omni lights, as these give a nice soft light, and as I wanted this scene to be an evening time scene, the Omnis give a defocusing effect on things around them, just like real soft sunlight gives.
I added one Omni to the rear of the scene to give the whole secen a soft light.
To this Omni, i gave a glow lens effect so that you can see it once renders. These gives the illusion of the sun. I coloured it accordingly so that it looks like a setting sun.
Aswell as this omni, I added another one just infront of the title, yet not as strong as the other. This just lights up the title so that is can be viewed from the front. If this Omni were not here, the front of the title would be cast in shadow as the sun Omni is placed at the rear of the scene.
I then thought that the scene didn't seem complete, so I imported my Spitfire into the scene, which brings my total Spitfire scenes to 3.
This ties with the rest of the scenes, and gives the animation a short storyline.
The spitfire flies over the title and then off screen.

Monday, 22 November 2010
In Flight Scene
To create a flight scene to follow the takeoff one, I opted to go simple.
For the sky and background, I created a Sphere.
I made sure that the sphere was large enough to house my spitfire, and a substantial amount of space around it.
I then applied a skyline texture to this, the same skyline texture I used for the take off scene, except this time without the silhouettes of trees and buildings.
I orientated this correctly, so that the blue of the sky is at the top the scene.
For the scene to be animated, I inserted a camera. I wanted the camera to float around the plane as its flying, showing all the detail of the plane. And so I made the camera pan around the plane, moving up and down aswell, to get a full view of the plane.
Here are some images of my build up and the end result.


Saturday, 20 November 2010
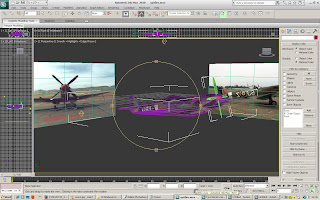
Airfield Scene
As Glenn was creating the Car seen for NorthWeald, I created the Plane one.
I started up a fresh MAX file and imported my spitfire into the scene.
I then set about creating the floor first.
I created one plane that would act as the airstrip itself, and another larger plane that would act as the surround grass.
I then created a Sphere for the surrounding background. The reason for choosing a sphere is so that there is no corners when it comes to renders, and no chance of gaps in the scene, which would look very unprofessional.
I managed to use the same grass material for the grass in this scene as i did for the Hadleigh scene. However, i did change the brightness and hue slightly in photoshop so that it did not look the same, and tied in better with the evening theme of the Airstrip scene.
For the airstrip, I used a default Asphalt material found in the MAX maps, however I changed it up slightly in photoshop also, and added a strip down the centre.
Once this was inserted into max, I used the UVW map tool to orientate it correctly, so that it tile down the runway.
I then placed the runway plane extremely close but still slightly above the grass plane.
To add an extra effect, I added small omnis down the entire length of the strip, giving the illusion of runway lights at an airstrip. Northweald may not have these, but I thought that it gives a better impression of an airfield than if they were not there.
Light for the entire scene is again supplied by an Omni floating high above the rest of the scene but still inside the sphere.


Wednesday, 17 November 2010
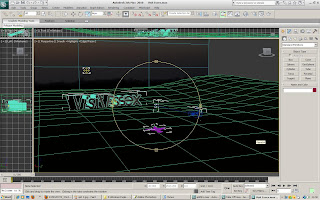
UVW Unwrapping
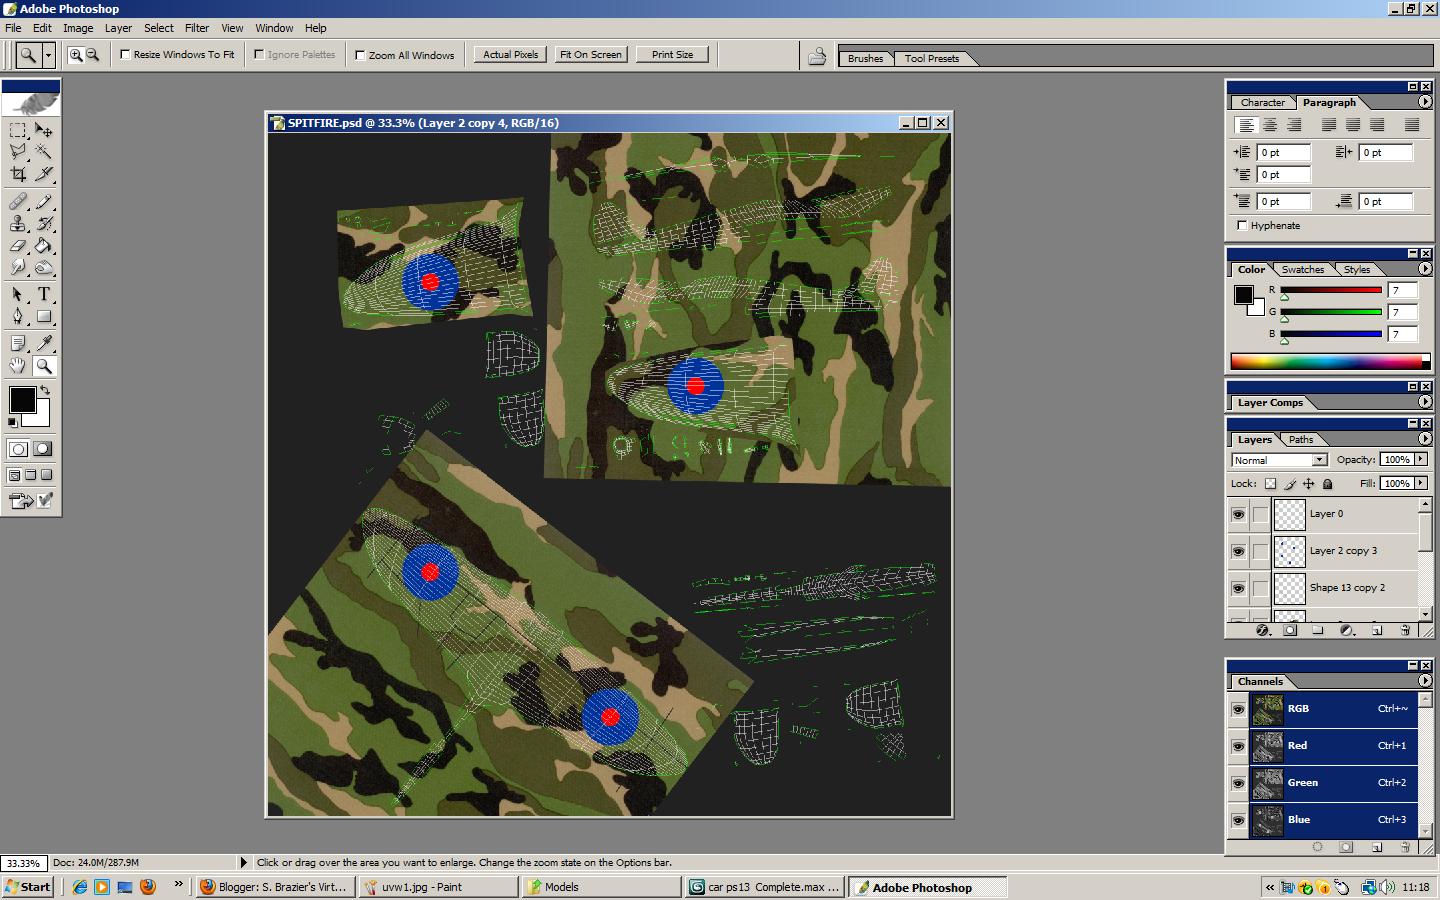
To create the most realistic Spitfire possible, I decided to use UVW Unwrapping, much like my head model, to achieve the best maeterial wrap possible.
As you can see from the images below, after first unwrapping my model, my mesh was rather a mess. However, I did try and work with this, and create a material for this mesh using photoshop. I completed the material, and brought it back into 3DSMAX. However, it did not come out aswell as I had hoped, and so I went back and changed my mesh.
It took me around 10 hours to stitch the mesh together, and ortietate it correctly, due to the small parts of the mesh that were scattered around the page.
However, once i had completed the mesh, making a material for it came alot easier.
I was now able to use images of actual spitfires as opposed to a camo material I was using previously to create my material.


Friday, 5 November 2010
Spitfire Modelling
I wanted to create my Spitfire as accurately as possible to ensure our animation didn't look gimmicky.
I decided the best way for me to create the spitfire would be to use the same method as I used for my head model.
So the first thing I did was set up some planes with images of spitfires from different views. These would act as my reference planes for my model.
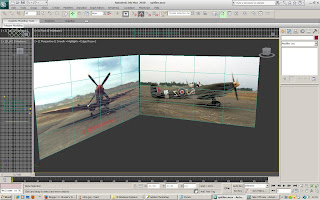
Now I had something to work from.
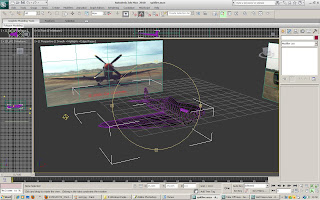
From here, I used the next method I used with my head model.
I created polygons using the line tool over the top of my side on view of the spitfire. I then converted these into editable polys so that I could manipulate them.
After much modeling and playing with the polygons, I was left with this basic shape.
As you can see, I added exhausts onto the side of the plane.
At this stage the plane was rather crude in its shape, and a turbosmooth was added to smooth out any irregularities in the surface.
Now i could use the symmetry tool, just like my head model, and create the other half of the plane.
Once the plane body was in place. I could create the propellers.
I created an individul blade first, and then cloned this 3 times, so that I had 4 exact clones.
I then placed these at 90 degrees from each other.
I wanted the propellers to spin just like the real thing, so I used the Set key feature, and created a key frame at 0, then rotated the propellers 360 degrees and created another key frame at 5.
however when I tried this, it did not work, and the propellers spun off centre and unnaturally. I realised that the pivot point of the propellers was way off.
In order for them to work properly, i would have to group them around a tiny reference object, that would act as the pivot point.
Once i had set the pivot point as this tiny object in the middle of the propellers, i could go back and add key frame to get them to spin.
I tested this and then spun fine, but obviously stopped and started.
For all my scenes with the Spitfire, the propellers will be moving constantly, so i used the Out Of Range Types tool in the Curves editor to get my propellers to constantly spin. This tool loops the key frames I had already placed in the scenes, and loops them infinitely.
I decided the best way for me to create the spitfire would be to use the same method as I used for my head model.
So the first thing I did was set up some planes with images of spitfires from different views. These would act as my reference planes for my model.

Now I had something to work from.
From here, I used the next method I used with my head model.
I created polygons using the line tool over the top of my side on view of the spitfire. I then converted these into editable polys so that I could manipulate them.
After much modeling and playing with the polygons, I was left with this basic shape.

As you can see, I added exhausts onto the side of the plane.
At this stage the plane was rather crude in its shape, and a turbosmooth was added to smooth out any irregularities in the surface.
Now i could use the symmetry tool, just like my head model, and create the other half of the plane.
Once the plane body was in place. I could create the propellers.
I created an individul blade first, and then cloned this 3 times, so that I had 4 exact clones.
I then placed these at 90 degrees from each other.
I wanted the propellers to spin just like the real thing, so I used the Set key feature, and created a key frame at 0, then rotated the propellers 360 degrees and created another key frame at 5.
however when I tried this, it did not work, and the propellers spun off centre and unnaturally. I realised that the pivot point of the propellers was way off.
In order for them to work properly, i would have to group them around a tiny reference object, that would act as the pivot point.
Once i had set the pivot point as this tiny object in the middle of the propellers, i could go back and add key frame to get them to spin.
I tested this and then spun fine, but obviously stopped and started.
For all my scenes with the Spitfire, the propellers will be moving constantly, so i used the Out Of Range Types tool in the Curves editor to get my propellers to constantly spin. This tool loops the key frames I had already placed in the scenes, and loops them infinitely.

Tuesday, 2 November 2010
Tyre Barrier
To go with the Northweald Motorsport scene, I created a Tyre Barrier that will be placed at the side of the track.
As most people will know, tyres are used as barriers in most racing car events, as they provide protection for the car and the driver as opposed to a concrete barrier.
To create the individul tyre, I used the same method as I did for Hadleigh Castle. I create a Cylinder, and deleted the middle polygons. Instead of stitching it together, i left the inside open, as the inside would not be seen.
I then applied a tyre material to the outside. I found 3 different tyre materials in the default images on MAX.
I cloned the original tyre a number of times until I had a substantial tyre wall. I then applied each material randomly to different tyres. To make sure the material fit properly to each tyre, i used a UVW Map.


Monday, 1 November 2010
Northweald Airfield
As a group, we are very interested in transportation, especially cars.
A chance to include our personal interests came in the form of Northweald.
Northweald is host to many different airshows, and car shows, year round.
Lots of different track effects take place at the airfield, from racing, to drifting.
We have decided to recreate this prominant place in Essex in a couple of scenes.
We will recreate the corner shown below for a car scene, and the airstrip for a plane scene.
Monday, 25 October 2010
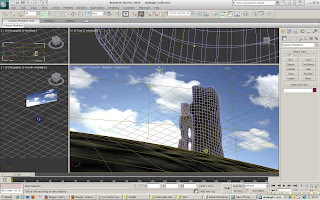
Creating the Scene for Hadleigh
I wanted the scene for Hadleigh to be looking up at the tower, from lower down the hill on which it is set. This would allow the viewer to look up at the sky and the sun, as well as the hill and the tower.
I started by creating the hill for my scene.
I used a sphere as the base, and removed allt he polygons from the rear side, as I would not be using these, and by having left there, it would take longer to render when the scene is finished, so I decided to discard of these early on.
I then shaped the hill around the tower. I placed the tower with the base slightly implanted into the hill, so that it looks built onto the hill, as opposed to placed on the hill.
I did add a hair and fur modifier to the hill at first, however, after a test render, it took far too long too render just one frame, so I decided not to include it.
Instead, I found a realistic grass image, and used this in the material editor, and made it look as realistic as possible, also using the UVW map to get it in the correct position.
For the sky, I added a flat plane at the back of the scene and added a sky image. I then turned the self illumination up to 100% so that no shadows would be cast on it.
For lighting, I used an ultra bright Omni, that sits behind the castle, high in the sky, but still viewable. I added a glow to the Omni, so that it is viewable, and colour it a light yellow colour, with a slightly darker yellow hue to the outer glow ring.
Now my scene was complete, and all that was left to do was animate it.
I used a camera low down on the scene, looking up at the castle and the sky and sun. I made the sky move to one side as the clip progressed, to give the impression that the clouds were moving.


Friday, 15 October 2010
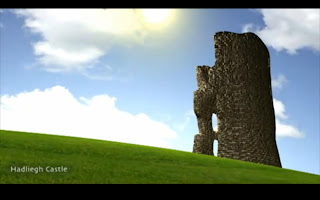
Hadleigh Castle.
I felt that Hadleigh Castle would be a good location to model for our animation.
The ruins of the castle sitting atop a hill would be a great scene once rendered, and you would be able to catch the sun and sky in the scene aswell as the castle itself.
For this scene, I decided to model one of the remaining towers of the castle, as this is the most recognisable part of the remaining ruins.
To create my model, I started with a cylinder, which I made into the rough dimentions of the castle tower.
From here, I chose to discard of the middle sections of the top and bottom caps, as well as part of the side.
As you can see from looking at photos of hadleigh, a large portion of the side is missing.
Once these polygons had been deleted, I had to stitch together the open gaps of the model using the creat polygon tool. This would ensure that my model is completely solid with no holes or gaps in thew actual mesh.
Once this had been completed, i could start modelling the features of the tower.
I started by creating the windows in the tower.
The windows of the tower are small vertical slits, that are bevelled into the castle walls from the inside.
I also created the lumps and bumps on the sinde of the tower, which would have once been the floor to the different levels of the tower. all that remains of these floors are parts along the tower walls. I extruded the polygons where these features are.
Now I moved onto the outside of the tower, where I replicated the uneven top the tower.
The tower roof, and some of the top parts of the tower wall are missing, giving it an uneven surface around the entire tower.
Iused a combination of soft selection modifying and regular modifying to achieve the desired effect.
Once this was complete, I could move onto the rest of the outside of the tower.
The tower isnt perfect verticle, and actuals bevels out towards the base, so I replicated this in my model.
Now the model itself was complete, and it was time to add a material to the tower.
I used a brick material I found in the Program files of 3DSMAX for the texture of my model.
I imported this image into photoshop, where I played with the colour of the bricks, and then saved the image, to use again in 3DSMAX.
In order for the material to wrap around the tower correct, I used a cyclindrical UVW Map.
I then added a bump map of the same image to give the material more realism.
Tuesday, 5 October 2010
Change of Plan
At this stage in the game, we spoke to Jo Bowman about our idea.
However, she stated to us that around 10 other groups all had the same idea as us and were going to use it also.
We felt extremely disheartened by this, as we though we had come up with a unique idea for our project.
We decided to change our idea all together.
No longer would we go for simple renders for our animation. We were now aiming to out do everyone else, and create high quality, realistic renders, to our best ability.
We scrapped the revolving earth idea also, and found inspiration for our new idea from such adverts as Visit New Zealand. In these adverts, a showcase of locations is put infront of you, with a calming soundtrack. We wanted to recreate one of these for Essex.
This was our new idea, and away we went!
Friday, 1 October 2010
Basic Models.
As we would be showing various places around Essex, I decided a good way for the viewer to identify each location would be to include place signs in the scenes.
I started with a Chelmsford Sign.
This would then act as a base for each time we add a new place to the animation, all that would need to be change would be the material which is placed on the model.
To create the sign, I started with a box, that I made extremely flat.
I ensured that the largest face dimentions were of rough size of the real thing.
This would make it easier when applying the material.
I then created a long cyclinder, which would act as a leg for the sign. I then cloned this shape.
These two shapes were then moved into position as the legs for my sign. These were then attached to the main panel, so that if the object is moved, all parts move accordingly.
I then used an image of the actual sign used around Chelmsford as the material for my sign. I cropped and corrected the image orientation in Photoshop, before applying it to my model in the material editor.
For the legs, I applied a Satin Grey finish, which replicates the dull grey finish on most sign post legs.
Thursday, 30 September 2010
What is Essex?
I started by colecting images from around Essex to give myself an idea of where to start with this project.
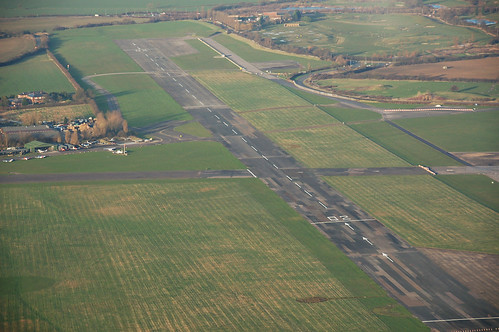
As you can see from the map picture below, a vast majority of Essex contains coastline. I feel this is an important part of what Essex is, and really hope we can incorporate this into our animation.


As you can see from the map picture below, a vast majority of Essex contains coastline. I feel this is an important part of what Essex is, and really hope we can incorporate this into our animation.
Tuesday, 28 September 2010
Some facts about Essex...
- £2.7 Billion per annum from tourism in Essex is brought into the economy.
- 350miles of coastline
- Most popular age group of tourists to Essex is the 40-60 year old age group.
- 70 Golf Courses
- 70% Rural
We want to try and bring these into our animation.
And hopefully, by using a wide range of themes, we can attract a younger age group to Visit Essex, alongside the older age group.
Saturday, 25 September 2010
Initial Thoughts
Brainstorming as a group, we decided on an initial concept for our animation.
As the 4 of us have a variety of skills in 3D software, we decided to go for a simple, cartoon inspired theme for our animation.
The animation would revolve around the concept of the Earth. The Earth itself would represent Essex, and on the earth would be a variety of the places and things to be found in Essex. This idea would give the impression that Essex has the world, all in one place, due to its variety of attractions.
The Earth would revolve, and the camera would take you to each attraction, with signposts showing where you are as the earth keeps turning.
We feel this is a good base to start our project around.
Thursday, 23 September 2010
Our Group.
I am pleased that I have some good friends working with me on this Project.
Our group consists of myself, Jack Draper, Glenn Osborne and Matt Rodi.
I have known Jack for around 7 years now, so we know exactly how each other work, and know of each others strengths. We have been in the same design classes since we met, so have a good knowledge of Graphic and Computer design. He is a keen designer, and a talented artist.
Glenn also went to the same school as myself and Jack, only a couple of school years above us. We met in the very first Semester of our course, and after having alot in common, became good friends. Glenn is a skilled designer, and a hard worker, and this shows in his work. We have worked together as a group of 3 for the previous 3 yeard in all our group work models, and we feel this will help us again this time when it comes to group work.
Our final member is Matt. We only met Matt this year, although we have shared some modules throughout our course. Matt seems keen to work as part of a group, and seems to have a good knowledge of the 3D software. He brought some good intial ideas to the table when we were brainstorming in our first group session. We welcome him to the group!
Wednesday, 22 September 2010
Visit Essex Project
As part of our Virtual Environment Module this Semester, we have been given a group work project to complete along side our Head Model.
Our brief was given to us in a small presentation at the beginning of the Semester.
We were spoken to by Ms Elli Constantatou, who is the Tourism, Marketing and PR Manager at Essex County Council.
She explained the Visit Essex project to us, stating the intentions of the project, to bring people to Essex, to make people feel welcome in our county, and to find new and exciting places and attractions here in our county.
To aid the project, we have been asked to produce a short animation, promoting the things that would bring people to Essex. As most people are well aware, Essex has had a Stereotype for quite some time, Stilettos, Boy Racers etc, and I feel we need to get away from this, and show the real side of Essex and all it has to offer.
Subscribe to:
Comments (Atom)